Order by Dec. 16 at 12pm for Standard Delivery. Order by Dec. 18 at 12pm for Expedited Delivery by 12/24
May 18, 2017 4 min read
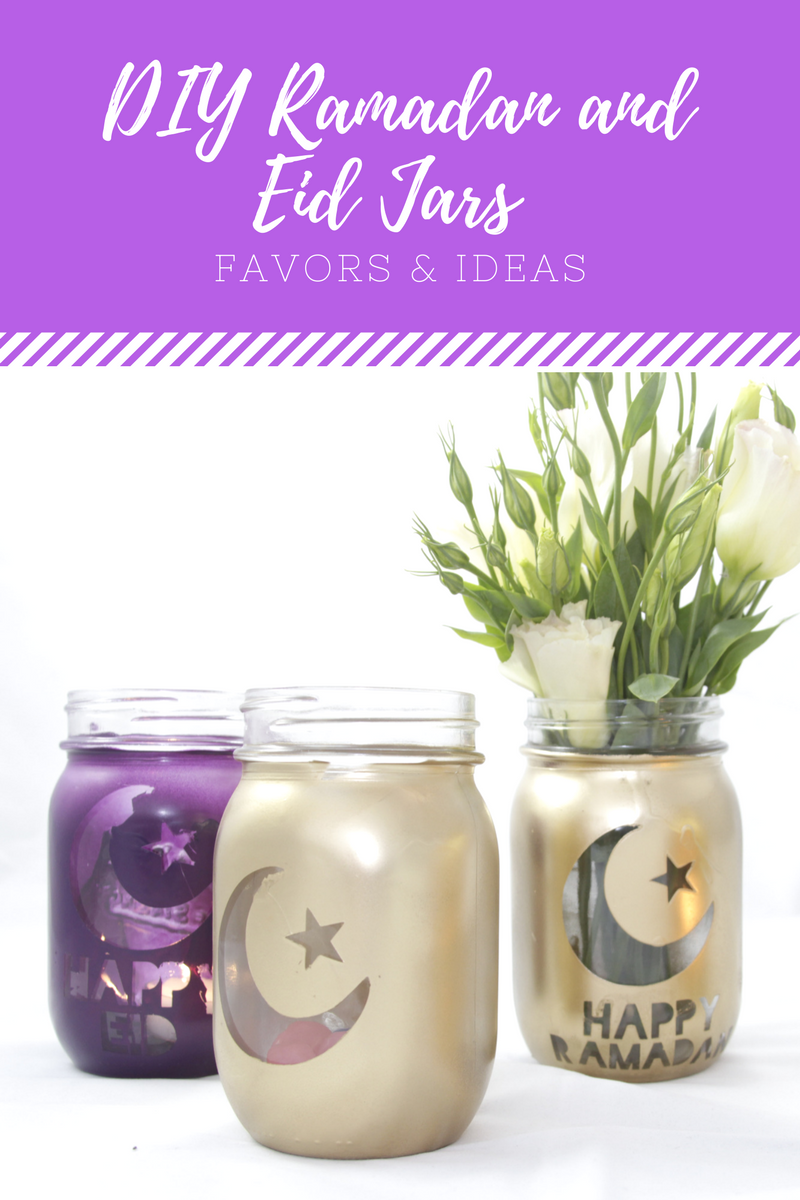
Over the weekend, we made mason jars to decorate our home with for Eid and Ramadan. We wanted something easy and quick, and since we are loving the #PurpleRamadan theme all over social media, we made some jars purple and some gold. We were inspired by a super cute tutorial for Easter in which you put a bunny sticker on a jar, spray paint it, and gift it filled with candy to friends and family. We knew we would do somethingjust as fun for Ramadan and Eid to decorate our home in. They make great Ramadan party decor or a great inexpensive gift. This craft is one you can easily get kids involved with.
You can do so much with Eid and Ramadan mason jars once they are done. You can use these as DIY Eid or hostess gifts -- simply put homemade salt scrubs inside, fill with candy and gift to a friend (tie a ribbon around the rim!), light with tea-lights, or even use as your centerpiece with flowers. (the flowers in our photo are my favorite - lisianthus - fragrant and last so long) SO many options! We think we’ll do a combo of the above and keep some aside for the wonderful Ramadan hostess' homes we will visit.
Here are the materials required:
1) Preparing your Jar
We want to make sure the rim is clean and pretty, so tape the top part of your jar using your painter’s tape. This will help you close it easily.
2) Cutting Your Stencil
First, prepare your stencil.
Stencil with Vinyl: The back of the vinyl has a little grid. Simply cut your vinyl (usually sold in 12x12 sheet) down to regular 8.5 x 11, and print the mirror stencil document on the BACK of the sheet. Be sure to use the file that is the “mirrored” image since you’re going to cut backwards. Then, you can use your scissors or your X-Acto knife to cut. If you use an X-Acto knife, please, please use a cutting mat.
Once your vinyl stencil is cut out, carefully peel the backing and place it on the side of the jar that does not have the brand on it. The vinyl is really sticky, so sometimes using a pair of tweezers help align.
To keep the little letters aligned, put them on your painters tape using tweezers (sticky side out). You can take the tape and rub the letters onto your jar.
Alternative Stencilling
You can print the "regular version" out and tape it to the top of your vinyl and use your X-Acto knife to cut the stencil. Either version works - I prefer the mirrored, though!
Alternatively, if you do not have access to vinyl, draw freehand stars and crescent on your painters tape and cut with scissors. Place these stars and crescents on your jar and press down. The more random the pattern, the better. (Hint - this method is a great way for your kids to get involved!). See jar with blue stars below. This creates a really fun abstract pattern - just be sure that the corners of your painters tape stars are pressed down really well onto the jar! :)
3) Ready to Paint
Go outside in a well-ventilated area and - really important - turn your jar UPSIDE DOWN and give it nice even coats of paint. Why upside down? This is to prevent any fumes from entering the jar, which is really important if you plan to gift this with food or bath salts. Who wants jars with fumes and candy? Not us! :D Wait until the jar is dry (about 30 minutes) and then bring the jar indoors. (Note - the cheap purple paint took far longer than 30 minutes to dry.
5) Ready to Reveal
Tada! Time for the big reveal. Carefully remove the stickers from the jar. I found the X-Action knife really came in handy here -- so carefully peel away the stickers to reveal our silhouette. #amazing. We had some imperfections, but overall, we thought the project was really fun and easy to do! Took us one hour, max.
So tell me what you think! Is this something you can try at home with your family? Tag us in your photos on Instagram @JasmineandMarigold, or use #JMRamadanJars. I'd love to see your spin! :D